Raspberry PiにSSMとCloudWatchエージェントをインストールしてみる
Raspberry PiにはRaspbian OSが入ってます。

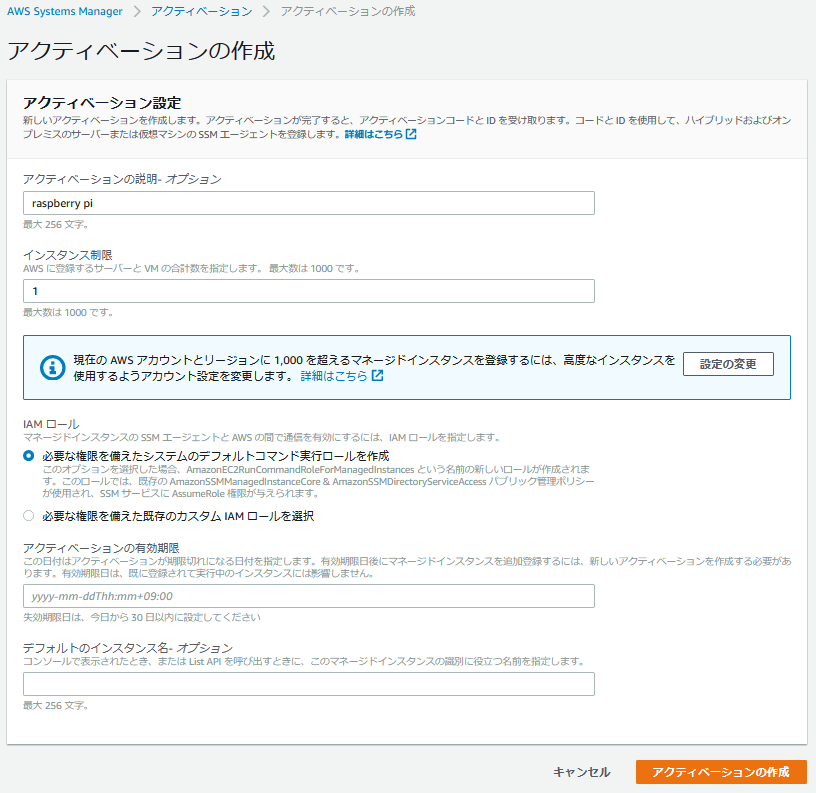
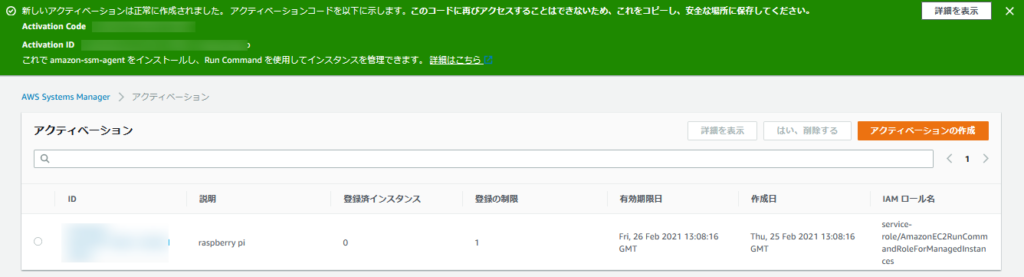
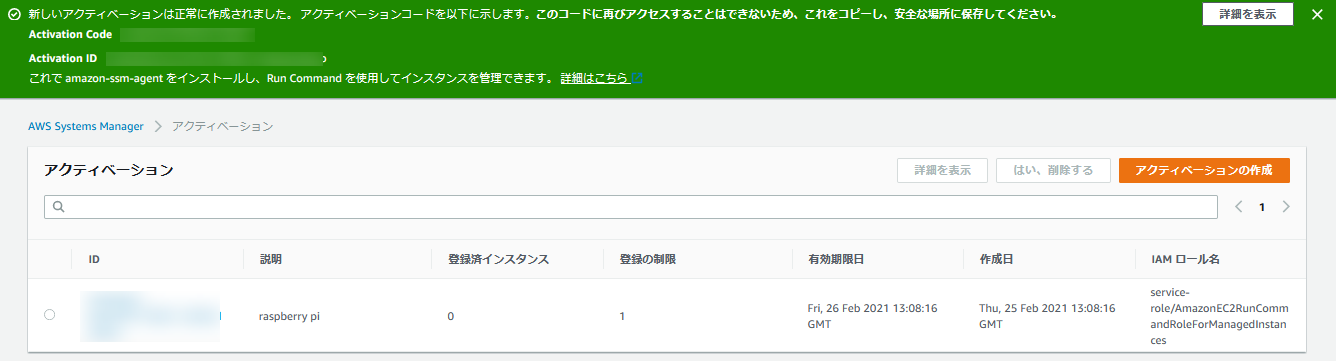
アクティベーションコードとアクティベーションIDが発行されるので控えておきます。
こちらを参考にインストールします。
「activation-code」と「activation-id」は先ほど控えた値を、「region」は東京リージョンで発行したので「ap-northeast-1」を設定。
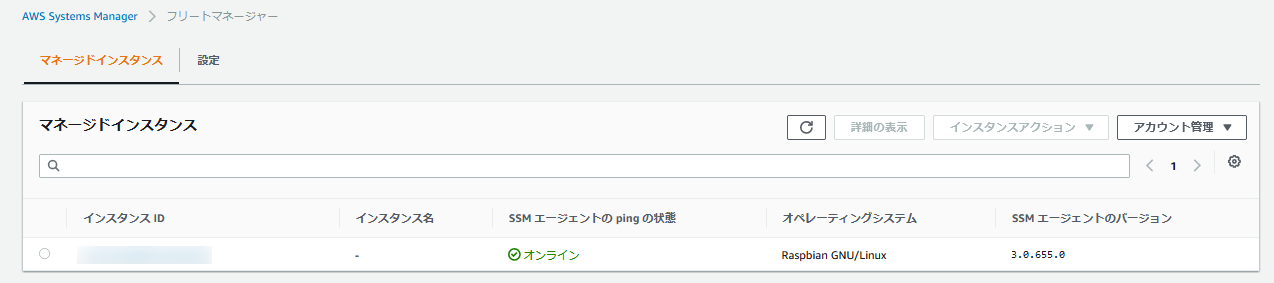
うまくいけばフリートマネージャーから登録されたRaspberry Piが確認できる。
下記のスクリプトを用意してGPIO2番にLEDを配線します。
コマンドドキュメントに「AWS-RunShellScript」を選択し、コマンドのパラメータに「sudo sh /home/pi/lchika.sh」を設定します。
ターゲットは「インスタンスを手動で選択する」から登録したRaspberry Piを選択。
実行してLチカできれば成功です。
ポリシーに「CloudWatchAgentServerPolicy」を割当てクレデンシャル情報を控えておきます。
公式のやり方だとエラーになってしまいます。
こちらを参考にします。
「setup.py」に次の一行を追加。
「setup.py」を実行して設定を入れていきます。
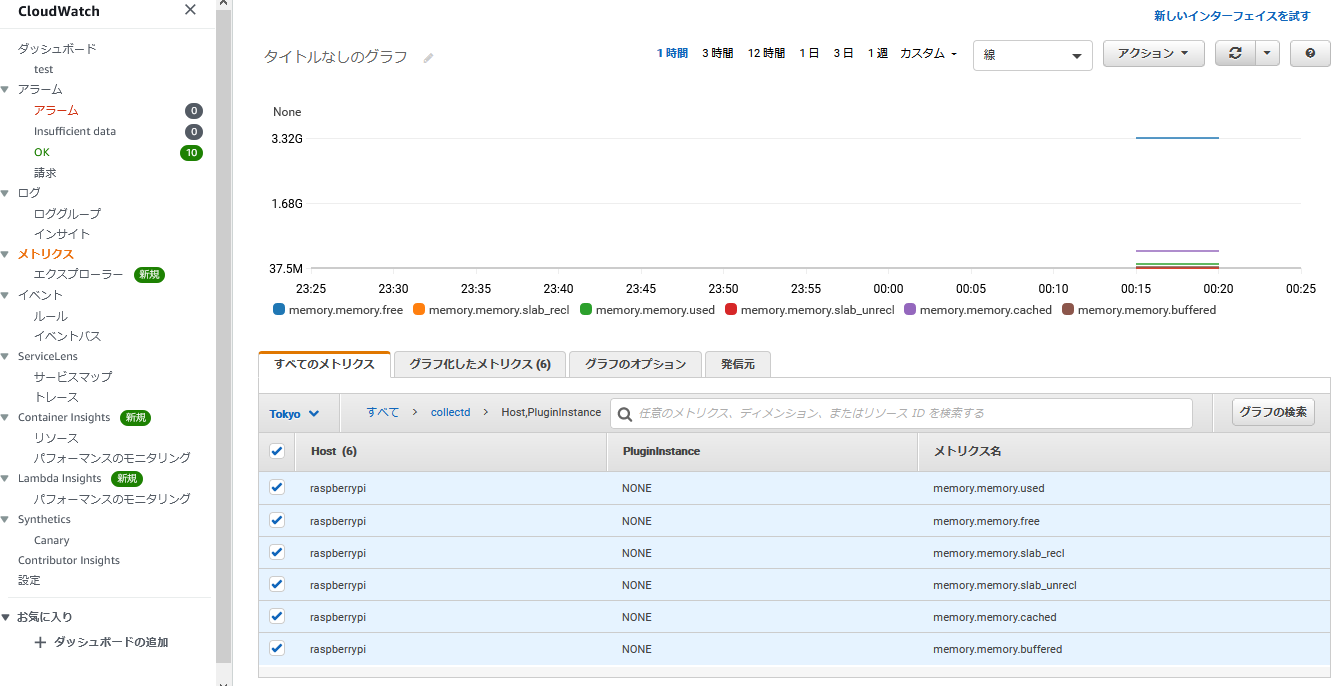
収集したいメトリクスをホワイトリストに追加します。
collectdを再起動します。
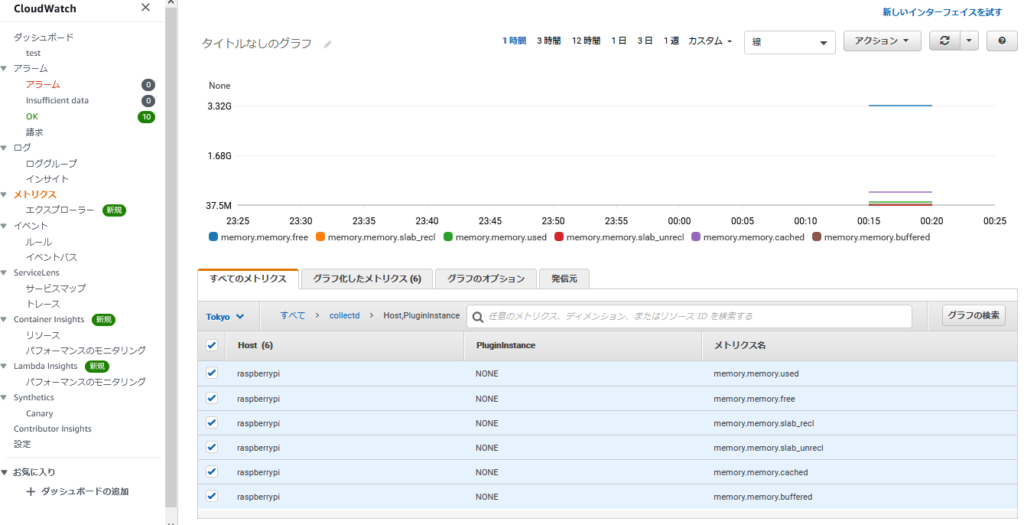
しばらくするとCloudWatchからメトリクスが確認できました。
目次
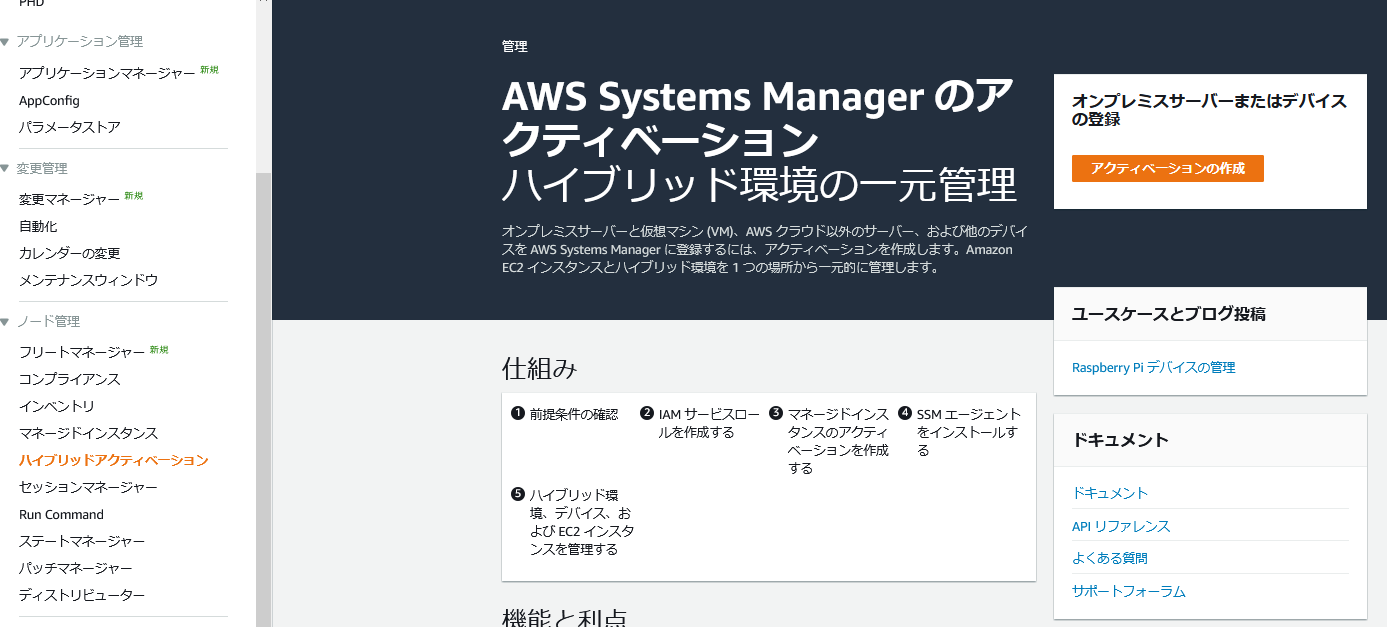
SSM
ハイブリッドアクティベーションの作成
アクティベーションコードとアクティベーションIDが発行されるので控えておきます。
SSMエージェントのインストール・有効化

こちらを参考にインストールします。
$ mkdir /tmp/ssm
$ sudo curl https://s3.amazonaws.com/ec2-downloads-windows/SSMAgent/latest/debian_arm/amazon-ssm-agent.deb -o /tmp/ssm/amazon-ssm-agent.deb
$ sudo dpkg -i /tmp/ssm/amazon-ssm-agent.deb
$ sudo service amazon-ssm-agent stop
$ sudo amazon-ssm-agent -register -code "activation-code" -id "activation-id" -region "region"
$ sudo service amazon-ssm-agent startうまくいけばフリートマネージャーから登録されたRaspberry Piが確認できる。
Run CommandでLチカしてみる
せっかくなのでRun Commandでリモートコマンドを実行してLチカするスクリプトを動かしてみます。下記のスクリプトを用意してGPIO2番にLEDを配線します。
#!/bin/bash

echo 2 > /sys/class/gpio/export
echo out > /sys/class/gpio/gpio2/direction

max=10
for i in `seq 1 $max`
do
    echo $(($i % 2)) > /sys/class/gpio/gpio2/value
    sleep 0.5
done

echo 2 > /sys/class/gpio/unexport

exit 0ターゲットは「インスタンスを手動で選択する」から登録したRaspberry Piを選択。
実行してLチカできれば成功です。
CloudWatch
IAMユーザーを作成
CloudWatchエージェントが使うIAMユーザーを作成します。
ポリシーに「CloudWatchAgentServerPolicy」を割当てクレデンシャル情報を控えておきます。
CloudWatchエージェントを設定

公式のやり方だとエラーになってしまいます。
$ wget https://s3.amazonaws.com/amazoncloudwatch-agent/debian/amd64/latest/amazon-cloudwatch-agent.deb
sudo dpkg -i -E ./amazon-cloudwatch-agent.deb
$ sudo dpkg -i -E ./amazon-cloudwatch-agent.deb
dpkg: アーカイブ ./amazon-cloudwatch-agent.deb の処理中にエラーが発生しました (--install):
 パッケージアーキテクチャ (amd64) がシステム (armhf) と一致しません
処理中にエラーが発生しました:
 ./amazon-cloudwatch-agent.deb
こちらを参考にします。
$ sudo apt-get update
$ sudo apt-get install collectd
$ wget https://raw.githubusercontent.com/awslabs/collectd-cloudwatch/master/src/setup.py
$ chmod u+x setup.pyDISTRIBUTION_TO_INSTALLER = {
"Ubuntu": APT_INSTALL_COMMAND,
"Red Hat Enterprise Linux Server": YUM_INSTALL_COMMAND,
"Amazon Linux AMI": YUM_INSTALL_COMMAND,
"Amazon Linux": YUM_INSTALL_COMMAND,
"CentOS Linux": YUM_INSTALL_COMMAND,
# add
"Raspbian GNU": APT_INSTALL_COMMAND,
}$ sudo python setup.py
Installing dependencies ... OK
~
Enter one of the available regions from: https://docs.aws.amazon.com/general/latest/gr/rande.html#cw_region
Enter region: ap-northeast-1
~
Enter hostname [raspberrypi]:
~
IAM Role could not be automatically detected.
Enter absolute path to AWS credentials file [/root/.aws/credentials]:/home/pi/.aws/credentials
Enter access key: *************
Enter secret key: ***************************
Enter proxy server name:
1. None
2. Custom
Enter choice [1]:
Enter proxy server port:
1. None
2. Custom
Enter choice [1]:
Include the Auto-Scaling Group name as a metric dimension:
1. No
2. Yes
Enter choice [1]:
Include the FixedDimension as a metric dimension:
1. No
2. Yes
Enter choice [1]:
Enable high resolution:
1. Yes
2. No
Enter choice [2]:
Enter flush internal:
1. Default 60s
2. Custom
Enter choice [1]:
Choose how to install CloudWatch plugin in collectd:
1. Do not modify existing collectd configuration
2. Add plugin to the existing configuration
3. Use CloudWatch recommended configuration (4 metrics)
Enter choice [3]: 2memory--memory-.*$ sudo service collectd restart